How to Replace a Faucet Washer
October 02, 2023

There are few things more annoying than a leaky faucet. Besides being worrisome, the constant drip can leave mineral deposits and discoloration in the sink or within the tap and pipes. More importantly, if left unattended, the leak will become worse.
It is fairly easy to replace a faucet washer. More often than not, the washer is the culprit behind the leak.
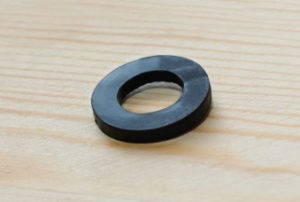
A faucet washer is a small, round, rubber disk that resembles a tiny donut and fits inside the compression faucet to provide a tight seal. That seal is needed to prevent leaks. Once the washer becomes worn, the faucet begins to leak. No matter how tight you turn the handle to stop the leak, it continues to drip. In fact, turning the handle too hard will exacerbate the problem. Follow the steps below to fix a leaky faucet.
Turn Off the Water Supply
In older homes, you might have to actually turn off the water supply to the entire house. However, in most cases, the water to the faucet can be turned off beneath the sink. Look under the sink to find two handles: one for “hot” and the other for “cold”. Turn both handles to the right/clockwise to turn off the water.
Now, you are ready to approach the faucet washer. Before pulling anything apart, close the drain plug or cover it with a towel or washcloth. This is to prevent any of the parts from tumbling down the sink drain and creating a greater problem.
Faucet fixtures are somewhat malleable and easy to scratch, so cover a crescent wrench with a cloth or duct tape to prevent marks. Other needed tools are Phillips and straight-head/slot screwdrivers.
Disassemble the Faucet Handle
The inside body of the sink handle will be removed as follows: cap, screw, packing nut, stem, O-ring, and seat-washer. It is a very good idea to place these on a flat surface in the order they are removed. It will make replacing them that much easier when it is time to reassemble the faucet.
Most sink handles have a decorative cap, sometimes indicating (C) or (H). Carefully pry off the cap, remove the screw, and gently remove the handle. Use the crescent wrench to remove the nut, and then gently unscrew or pull out the stem. Beneath the stem is the O-ring (which is self-explanatory once you see it).
If the O-ring is stretched out of shape or disintegrating, it needs to be replaced. The size of the ring ranges anywhere from 3/8 to 5/8 of an inch. Set it aside and take it to the hardware store to use for size comparison. The O-ring must fit the faucet exactly. If the handle has been leaking, it is due to this ring’s poor fit.
Beneath the stem and under the O-ring is the seat washer. You will notice the seat washer sits atop a screw at the base of the fixture. Examine the washer to see if it is intact. If it is worn, stretched, or disintegrating, it is the obvious reason why the leak is occurring. It must be replaced.
Note the size of the washer and replace it with an exact replica. If it is too degraded and impossible to use for size comparison, then “eye-ball” the size/space where it will sit and buy several different size washers that might fit in the space. They are very inexpensive and buying more than one will eliminate multiple trips to the hardware store. Your water can also be turned back on again more quickly.
Once the washer is in, replace the faucet parts in the opposite fashion from which they were removed. It’s fairly quick to replace a sink washer. A homeowner with minimal mechanical experience can complete the job within an hour. For your other plumbing needs that go beyond a simple DIY fix, give us a call to help out before it becomes an emergency.
Get 10% off (Up to $150)

Ty Lindsay is the Director of Field Operations at Patrick Riley | Isley’s and a 15-year veteran of the plumbing and HVAC trades. In 2010, Ty earned his Journeyman’s plumbing license. He became a Master Plumber five years later and earned his Journeyman HVAC technician’s license that same year. Ty’s breadth of knowledge in plumbing and HVAC includes both residential and commercial work. He’s been a loyal member of the Patrick Riley | Isley’s team since 2016.
- Posted in:
- Tips